
How I am keeping myself sane while I wait for my dress to get here. (The dress that supposedly arrived in New Zealand 8 days ago, but has yet to make it to my PO Box)...
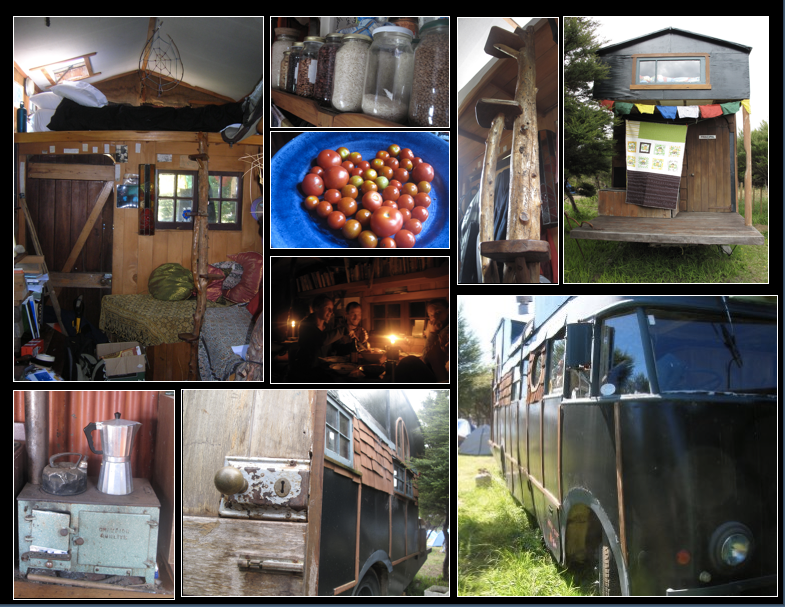
The two most frequently asked questions I've gotten not the 'bee are "Can you explain your housetruck?" and "How do you make your inspiration boards?". So I thought I'd kill two birds with one stone and do a little inspiration board tutorial using our cozy little house truck as subject matter.
So, I'm no graphic designer, and I don't have any fancy programs. So take my novice advice with a grain of salt. I use Microsoft Word, but these instructions would apply easily to powerpoint, if you prefer. And of course there are a million other ways to do these (including handy on-line inspiration board makers). I'm going to make this tutorial assuming complete computer illiteracy, so pardon any redundancy or explaining of silly details that are obvious.
I start with a blank document and change it to "landscape" (File - Page Setup - Orientation). Before I do anything else I always make sure that my formatting palette it showing. It just makes life much easier (View - Formatting Palette). This might also be a trivial detail, but when I'm doing a board I also like to make sure that I can see the entire page (View - Zoom - Whole Page).
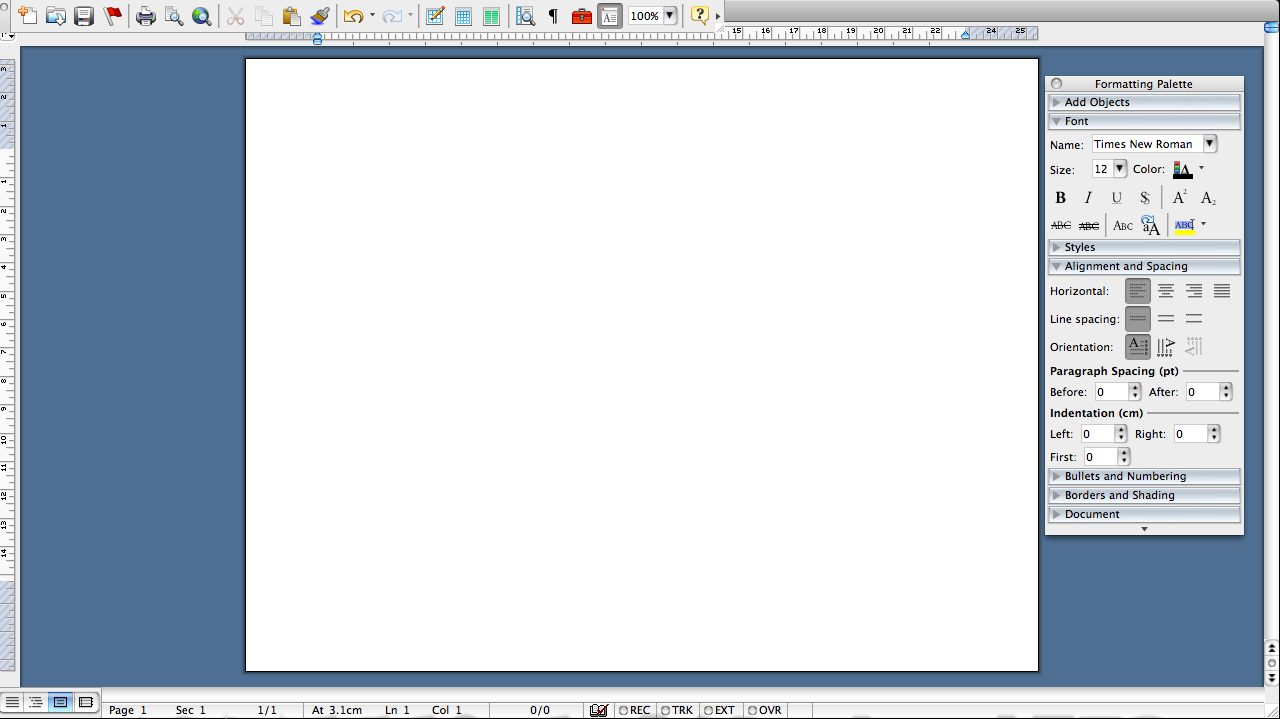
Now I'm almost ready to start. The final thing I do, before gathering images, is to add a page break. This is helpful so that you have one page to put all of your images, and one page to make your actual board (Insert - Break - Page Break).
OK, now I'm ready to add some images. Here's where stalking all those wedding blogs for months on end comes in handy. To grab an image off of a website the easiest thing to do is use your right mouse button to click on the image (Control+click if you have a mac), a menu will pop up and will allow you to "Save As". Make sure to save the images in a place you can find them later. Is this too much detail?? Oh well, I'll continue.
Some tricky websites make it so that you cannot save their pictures using a right click. This is where it gets a bit tougher. Those of you who have Macs can do a "screen shot" (Command+Shift+4). A crosshairs will come up and anything you select on the screen will become an image that gets automatically saved to your desktop. Some PC's have a similar tool on the keyboard that is called "Print Screen" which will essentially take a photo of your entire screen and save it.
I guess my only suggestions in regards to collecting images is to keep in mind that inspiration can come from anywhere, not just wedding websites. Design blogs, your favorite clothing stores, and even news websites can provide great inspiration images. Its best to have too many images rather than too few.
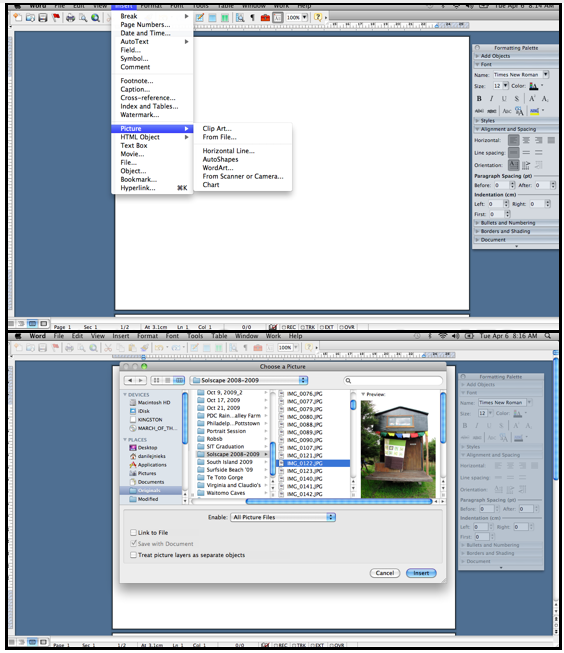
So now we have a bunch of images saved to our computer ( I often have too many, but no worries). Let's start putting them on the board. To insert a picture go to Insert - Picture - From File. Then you can find the image where you saved it onto your computer and add it onto the page.
Once the image is on the page use your right mouse button (or Control+click for Macs) to click on the picture. A menu will come up. Click on Format Picture - Layout - In Front of Text.
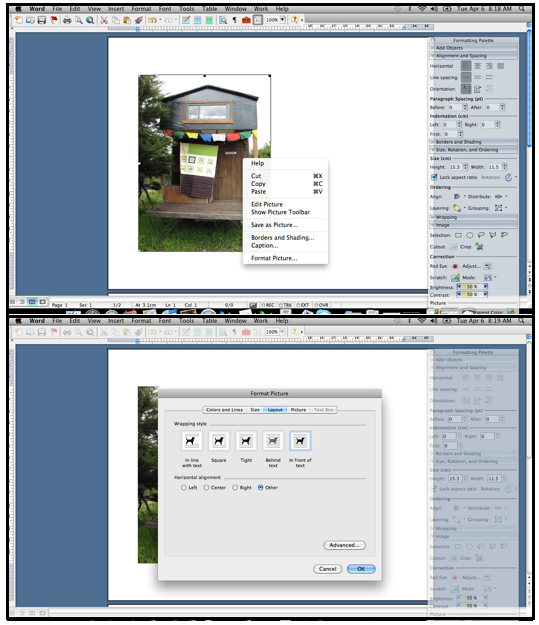
This will allow you to move the picture anywhere on the screen. At this point I usually resize it by clicking and dragging one of the corners to make it a manageable size and move it over to the right side of the screen so that it is out of the way. Then I repeat these steps until I have about 20-30 images on the page.
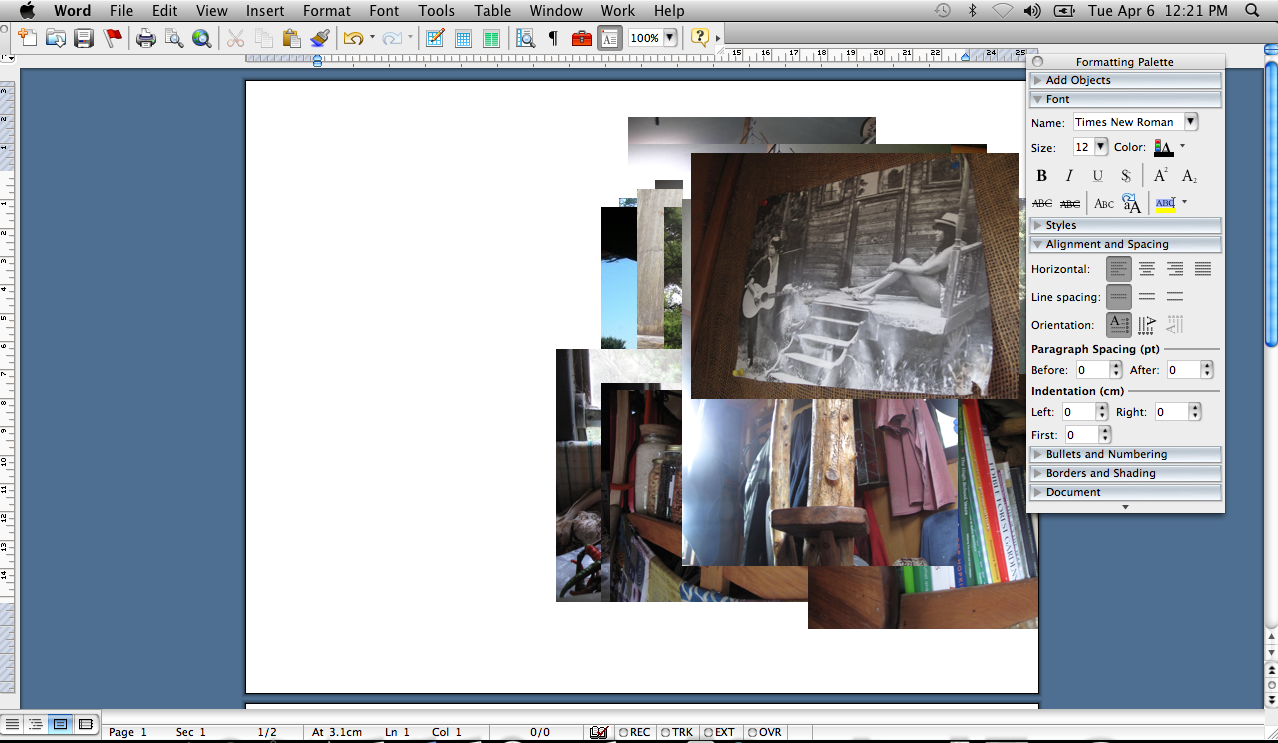
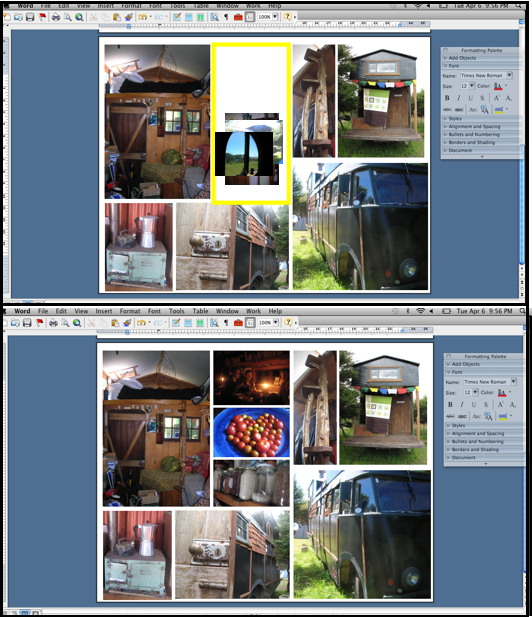
Occasionally you might get a picture that shows up sideways. In that case, after you format it to make it in front of the text, click on the picture. You will notice that your formatting palette gives you lots of options. In the menu "Size, Rotation, and Ordering", choose "rotation". You can either turn your picture 90 degrees right or left, or using the free rotate tool grab one of the corners of your picture and spin it.
So at this point you'll have a crap-ton of pictures in a pile on your page. I like to sort them now so I can figure out which ones will actually end up on the board.
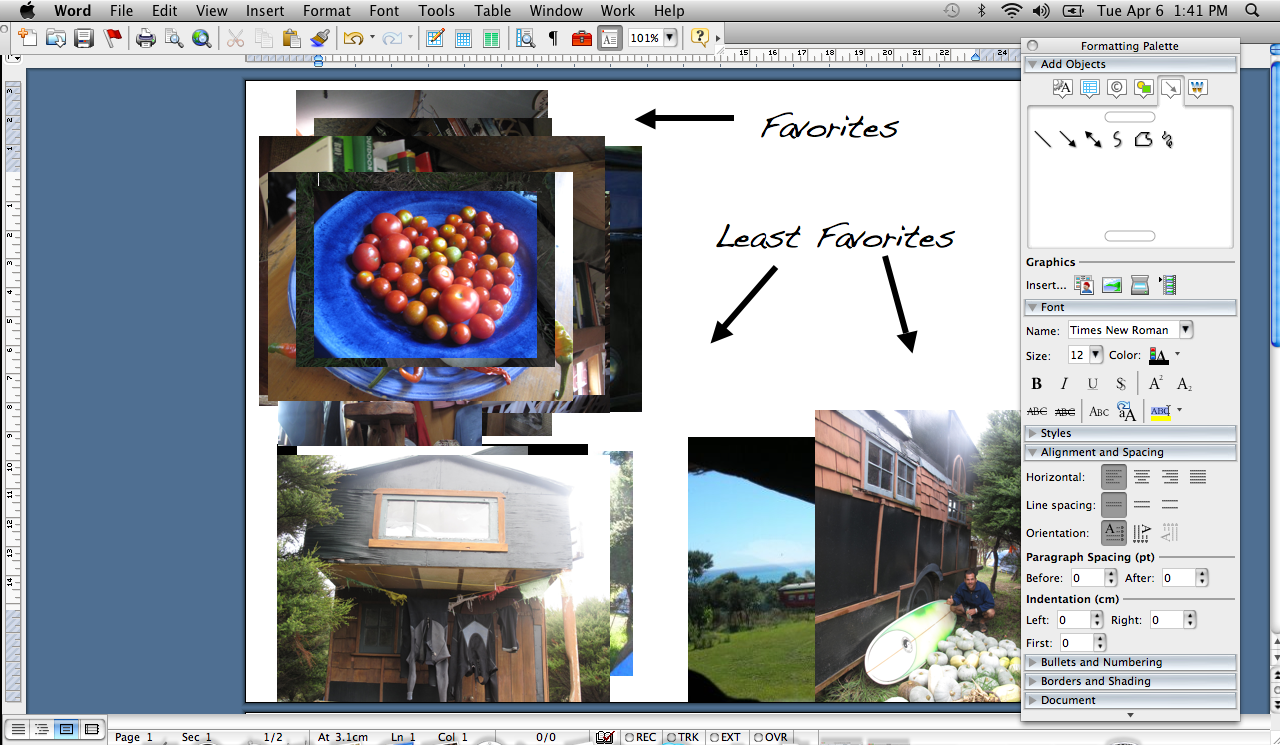
Then I drag all of my favorites down onto the second page, and try to make them all fit. It's not too important to get the sizes right at this point, and its not even too important if they overlap.
During this process you can start to crop your images to make them fit better. To crop an image click on the picture, you will notice that in your formatting palette there is a section called "image" there you will find a tool called "crop". Click on that icon and then you can chop off parts of the images that you don't want by clicking on the image and dragging the sides in. Here I've cropped the picture of the ladder up to our bed.
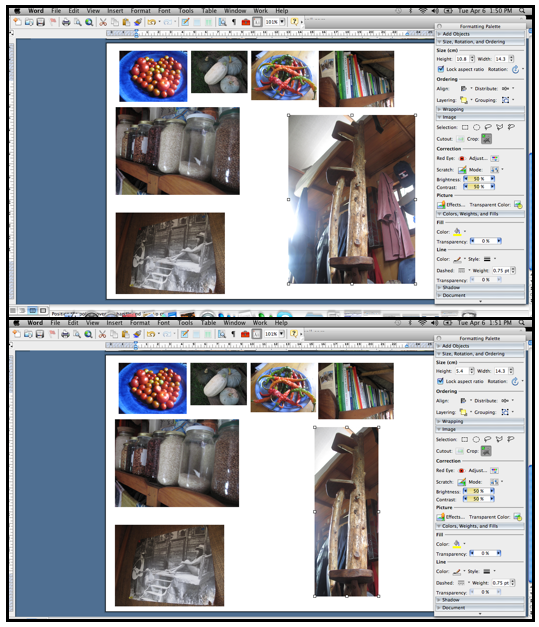
Once I've crammed as many pictures on the page that I think will fit I take a look at it and start getting rid of images. I never delete the pics, just move them up to the first page, so that if I need them as space fillers later, I can come back to them. You might delete photos that don't quite fit with the overall color scheme, that seem redundant, or that you just don't like as much.
On this housetruck board once I looked at the pics, I realized I had chosen a lot of food images as my favorites. What can I say? We're proud of our garden. I eliminated those to focus more on the actual housetruck.

Now you will have some blank spots, which will give you some room to maneuver the pictures. I usually try to pick a central image that most conveys what I'm trying to get across, and make that the largest image. Also keep in mind that images with a lot of detail will need to be larger than simpler images. (For example the interior shot of our house needed to be quite big so that you could see the details).
I would also say, that sometimes less is more. A well- thought out collection of select images may convey a stronger idea than a collage of many images.
Once I pick my one or two large images, I position them on the page and move the other images to the center. In my mind I then dived the page into rectangles. This makes it easy to place your remaining pictures.
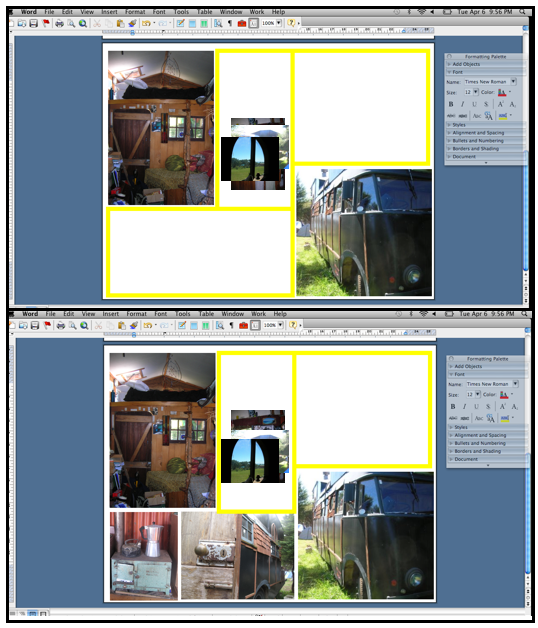
Working on one rectangle at a time, I move, resize, and crop the pictures to fit. Don't be afraid to crop the heck out of your images. Once I have filled a rectangle I move onto the next. I end up discarding a lot of images during this process.
Eventually, after a lot of trial and error I end up with something that looks like this. I think that somewhere between 8-16 images is ideal, depending on the size and detail of the images.
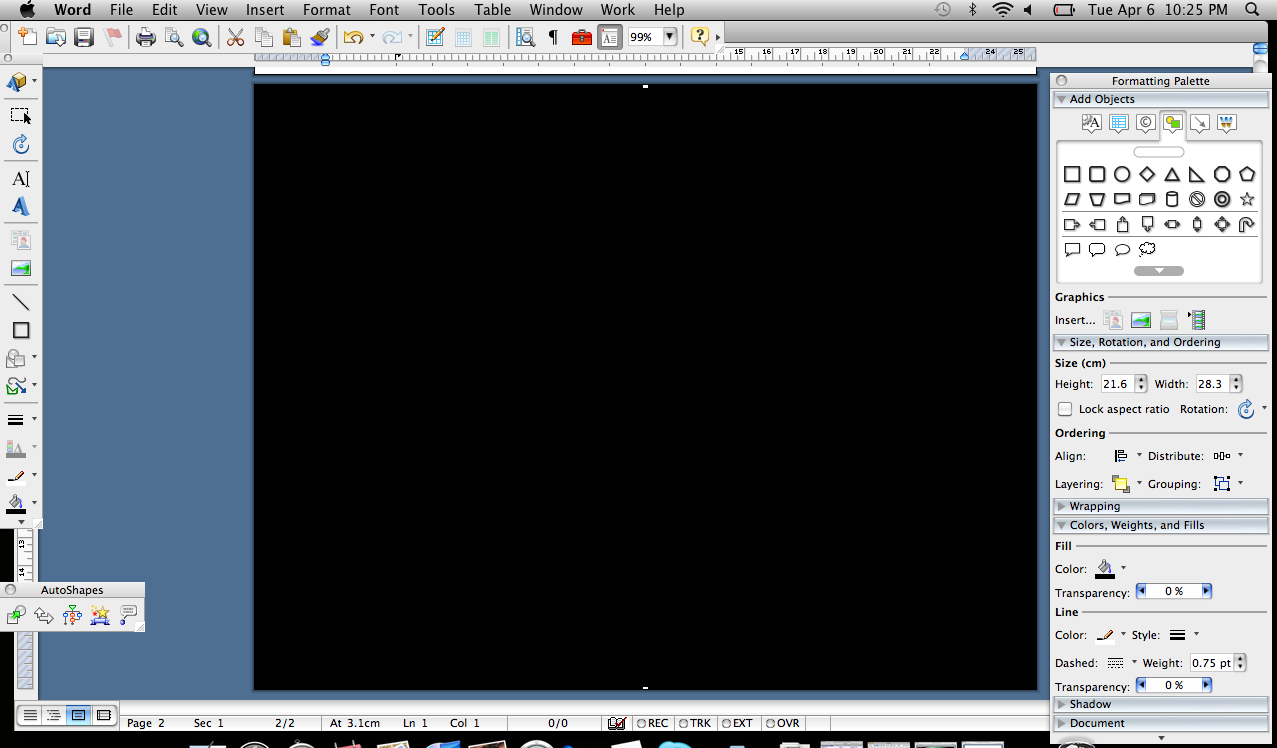
Now you're nearly finished. I often like to add a background to my boards. I find that fabric samples, textures, or even plain colors can give the board some extra oomph. To add a color background, choose "Add Object" on the formatting palette, and then click on the little picture of the circle and square. A menu will pop up with options of shapes you can add. Choose the square and draw a giant rectangle that covers your whole page. Click on that square and then look on your formatting palette for the section that says "Colors, Weights, and Fills". Change the fill color to whatever you want. You can even make it a pattern, or an image, using the "fill effects" option (I've chosen black because my board is quite busy already). You'll then have a giant rectangle covering the page in whatever color/ pattern you chose. To get it behind your images just right click on it to get a menu, choose "arrange" and then "send to back".
The final thing I often do is to add a line around my pictures. To do this press the shift button while clicking on each of your images until all of them are selected. Then look on your formatting palette for "Colors, Weights, and Fills", and click on Line to change the line color.
Now you're done. The last thing you have to do is make it an image so you can post it to the 'bee. I am a mac user so I do this using the "Screen Shot" feature (Command+Shift+4). However, if you are on a PC you can go to File-Print-PDF, and word will save your file as a PDF. Once you reopen the document in adobe you should be able to save it as another kind of file (like a jpg or png) using the save as feature. Note that you might have to resize your margins because adobe likes to chop things off.
Whew, that was long. Happy Inspirationing!

No comments:
Post a Comment